Jenkins 튜토리얼 따라하기 : react 배포
Sample repo 준비
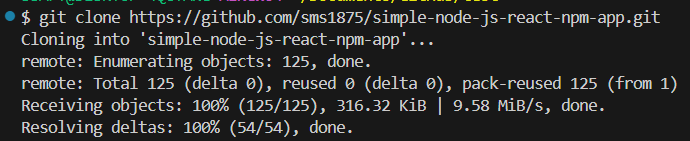
먼저 Jenkins tutorial에서 react repo를 fork한 다음 내 컴퓨터에 clone 해준다
link : https://github.com/jenkins-docs/simple-node-js-react-npm-app
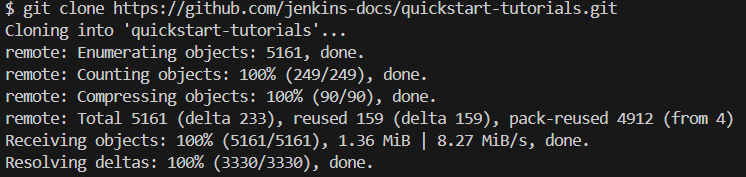
그 다음 Jenkins tutoral repo도 clone
link : https://github.com/jenkins-docs/quickstart-tutorials
Jenkins 실행
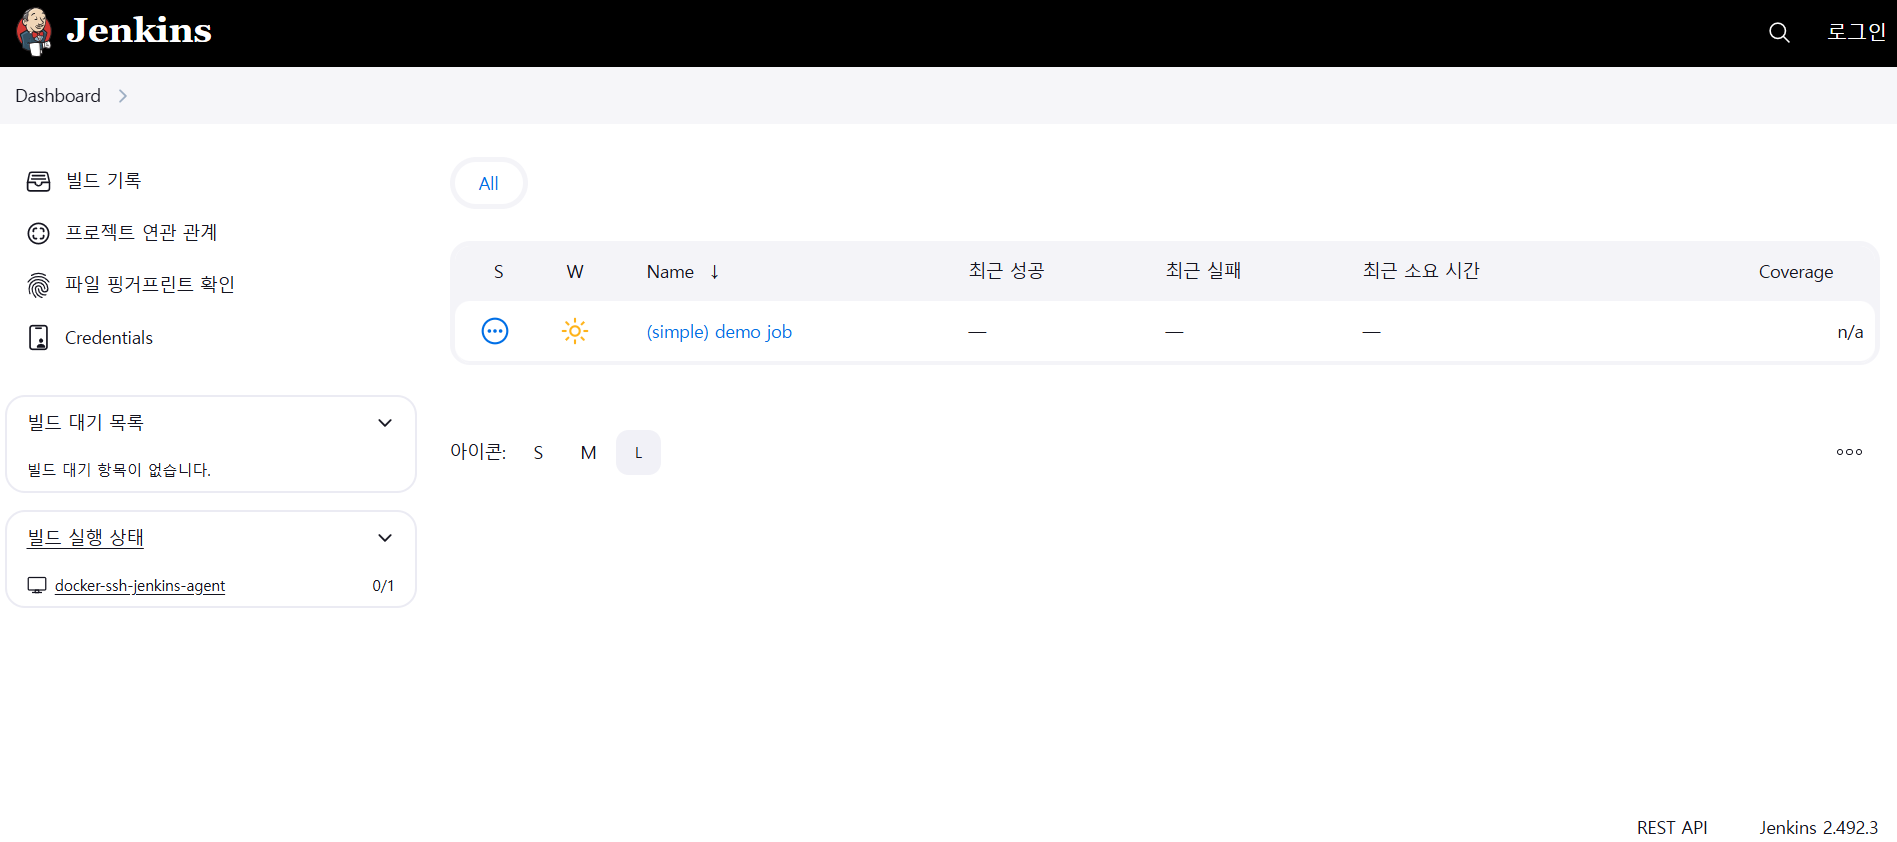
quickstart-tutorials 로 경로를 이동한 다음 docker compose를 실행해준다
1
2
cd quickstart-tutorials/
docker compose --profile node up -d
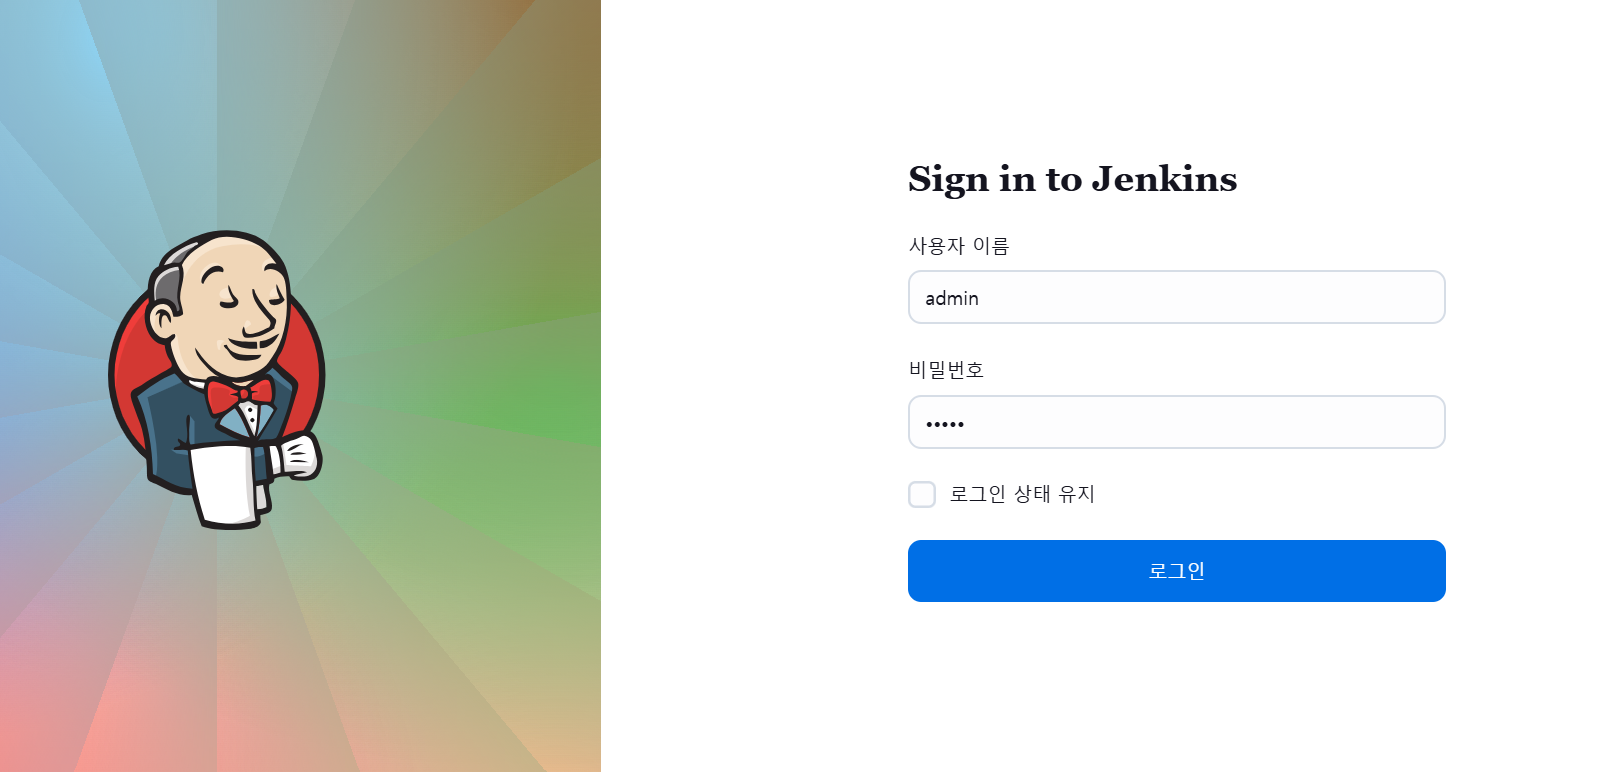
docker container가 성공적으로 빌드되면 http://localhost:8080 에 접속해서 jenkins server를 확인할 수 있다

tutorial repo에서 id 와 password는 모두 admin으로 설정되어 있다
Jenkins 에서 Pipeline project 만들기
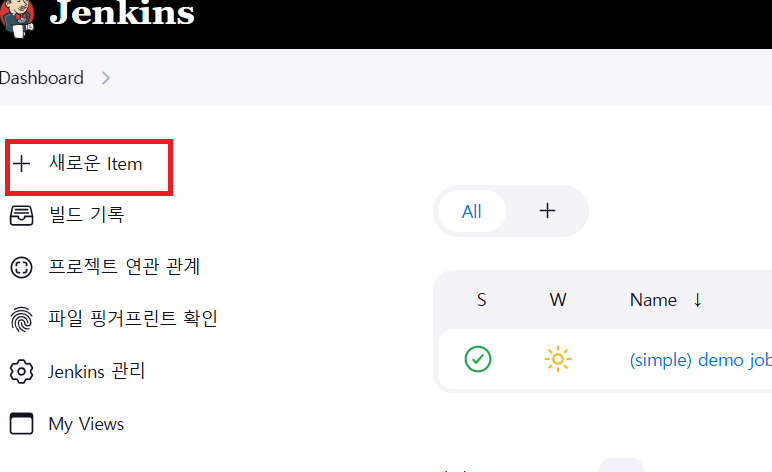
메인 화면에서 새로운 Item을 클릭
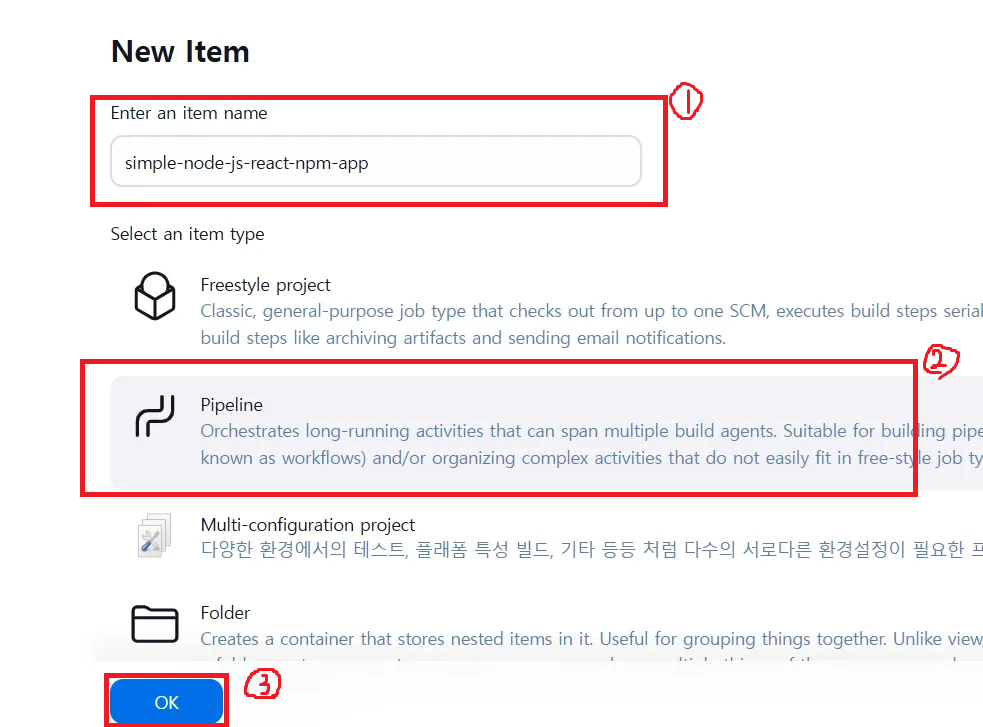
간단히 아이템의 이름을 적어주고 Pipeline을 선택한 다음 OK 버튼을 누른다
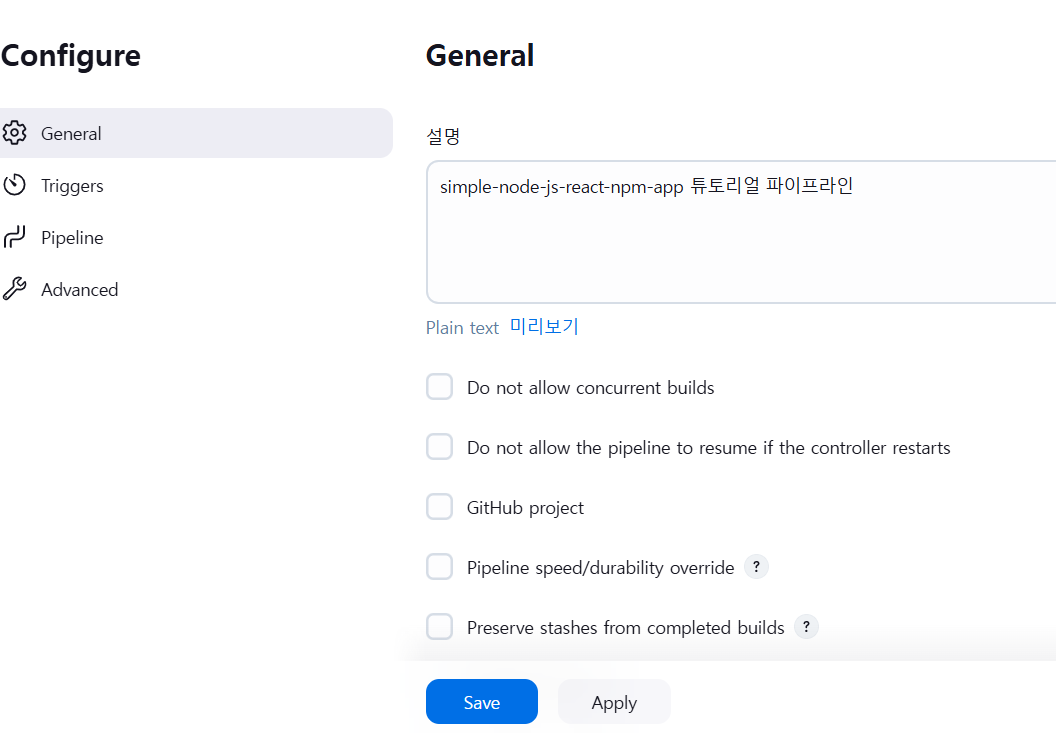
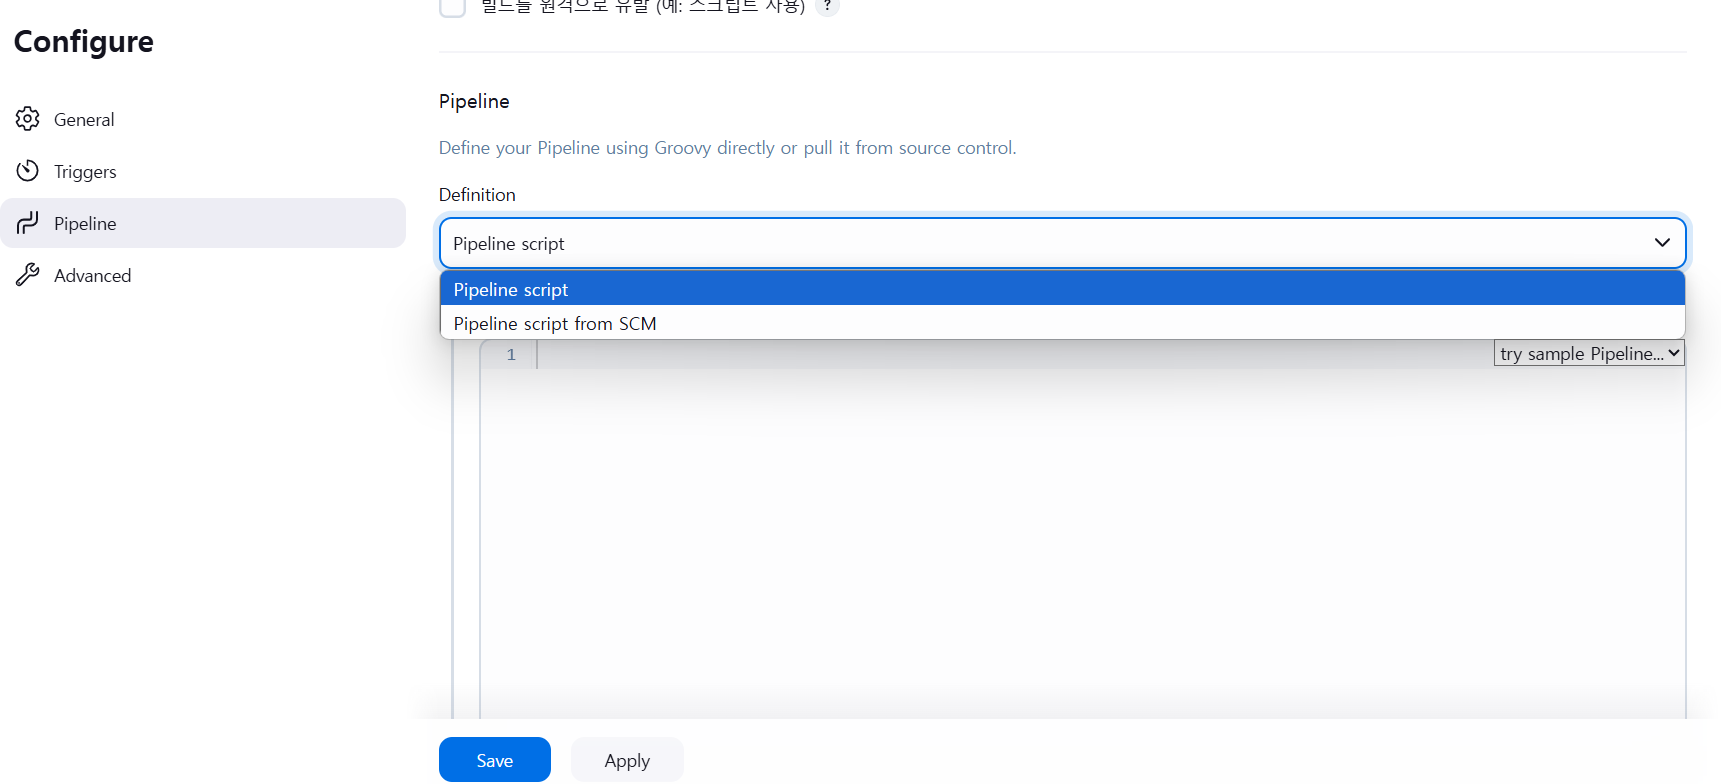
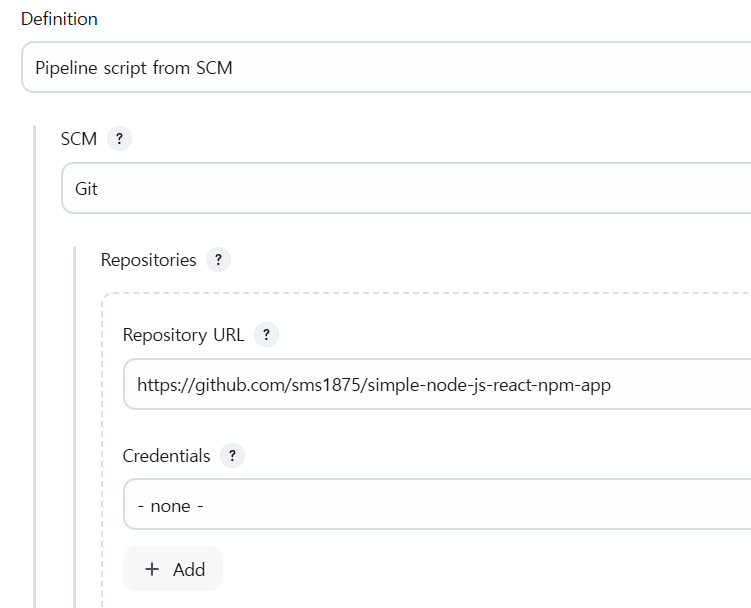
Pipeline 설명을 간단히 적어준 후, 아래로 스크롤해서 Definition에서 Pipeline script from SCM을 클릭한다
그러면 나타나는 입력창에 Git을 설정 후, fork했던 튜토리얼 repo의 주소를 입력후에 저장해준다
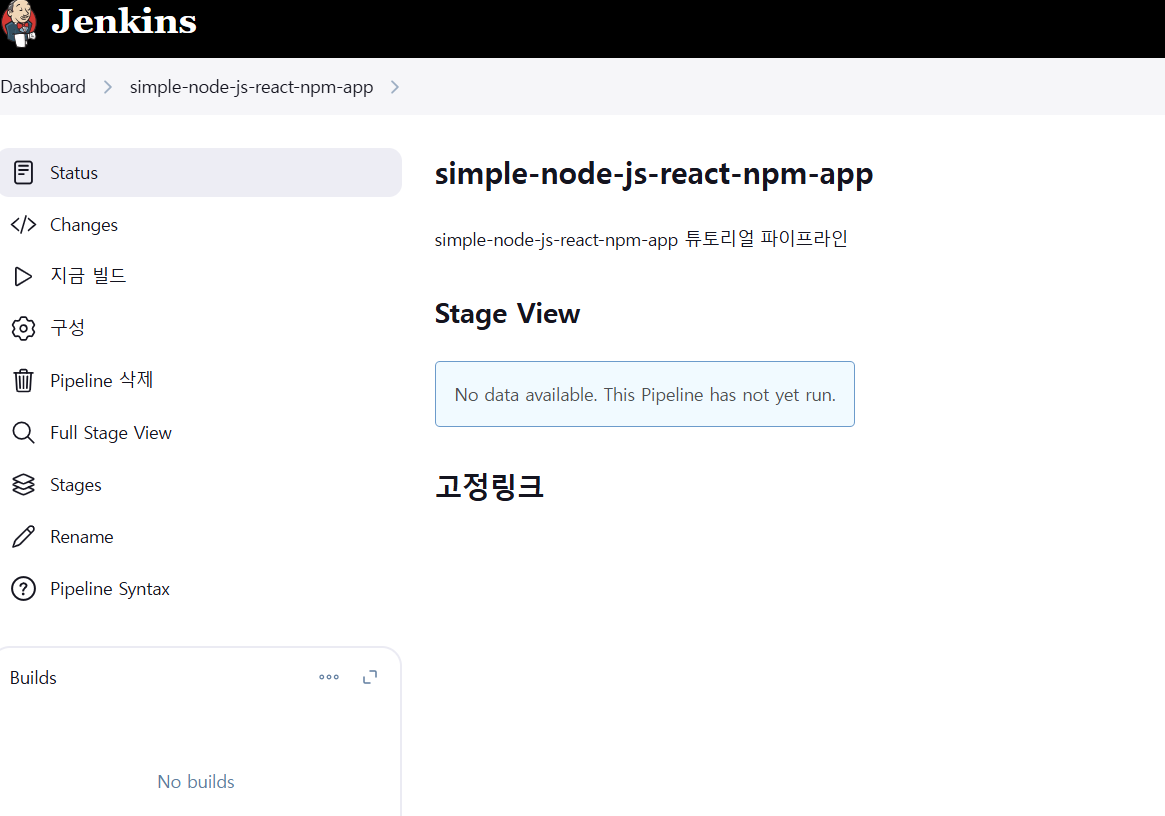
pipeline이 생긴 것을 확인할 수 있다
Jenkinsfile을 이용해 Pipeline 작성하기
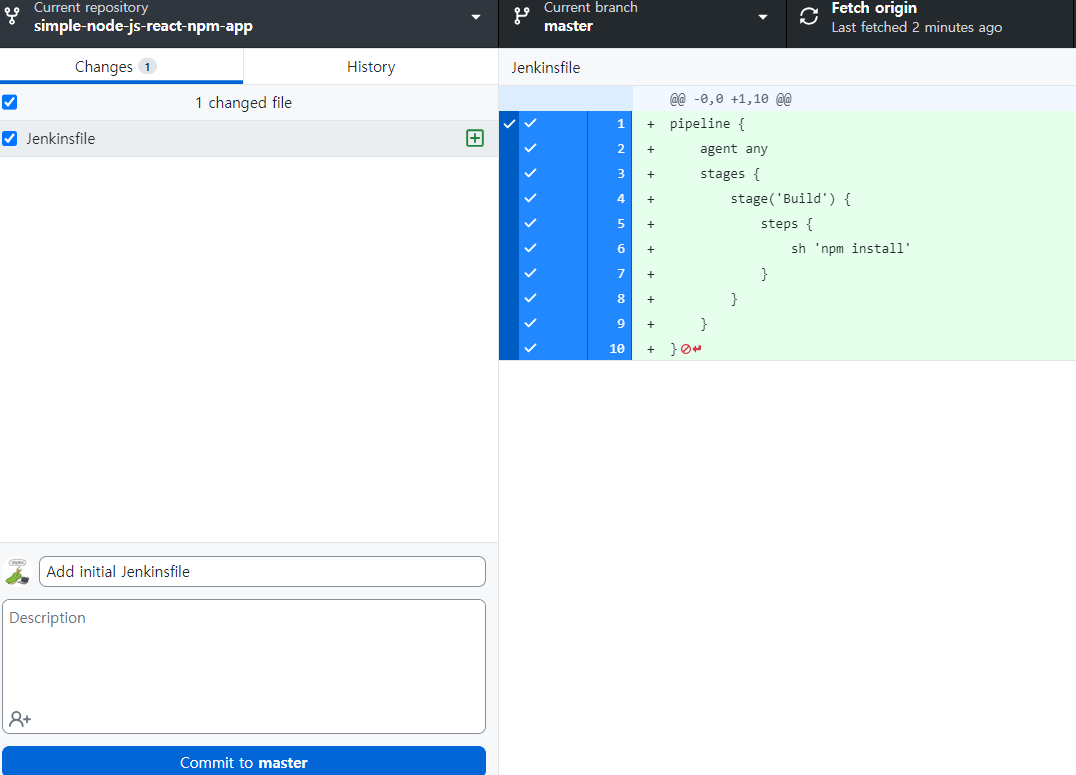
clone 했던 simple-node-js-react-npm-app repo의 root 경로에 Jenkinsfile 을 생성한다
1
2
3
4
5
6
7
8
9
10
pipeline {
    agent any
    stages {
        stage('Build') { // Jenkins UI에 'Build' 단계 표시
            steps {
                sh 'npm install' // 'npm install'을 실행해서 node_modules에 의존성 설치
            }
        }
    }
}

추가한 Jenkinsfile을 fork한 github repo에 push한다
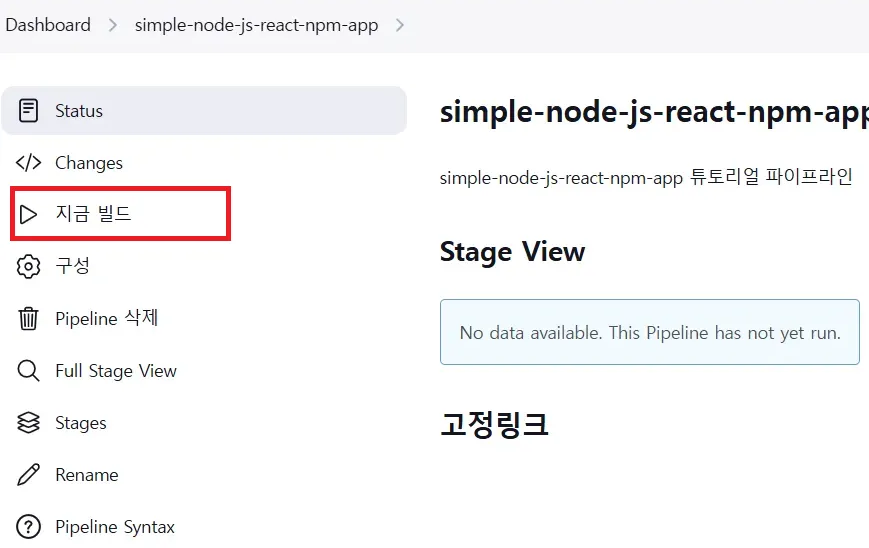
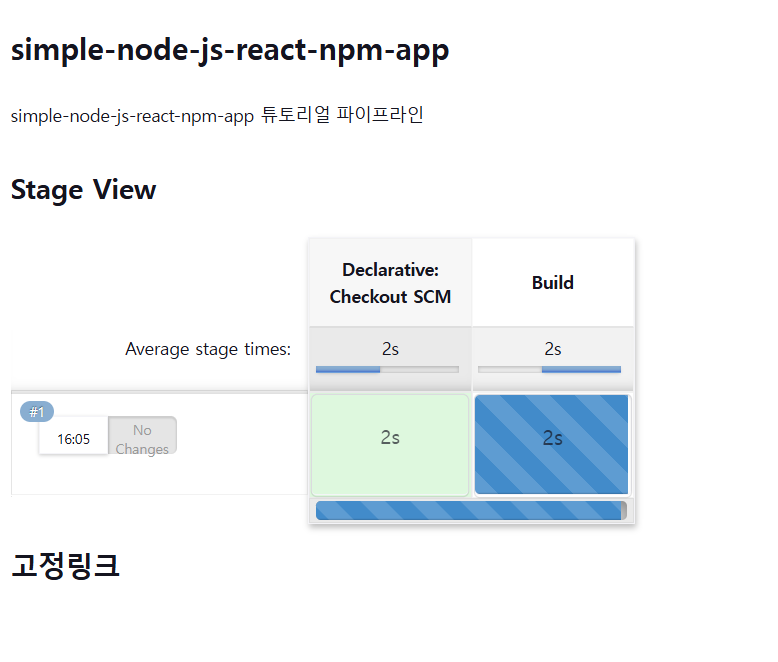
Jenkins에서 Pipeline 왼쪽 메뉴에서 지금 빌드를 클릭한다
Jenkins의 수행 과정은 다음과 같다
simple-node-js-react-npm-apprepo clone- 프로젝트를 agent에서 실행할 수 있도록 대기열에 등록한다
- Jenkinsfile에 정의된 Build 단계를 agent에서 실행한다
이 과정에서 Node.js 애플리케이션을 빌드하는 데 필요한 패키지를 설치하고, Jenkins의 로컬 저장소에 저장된다
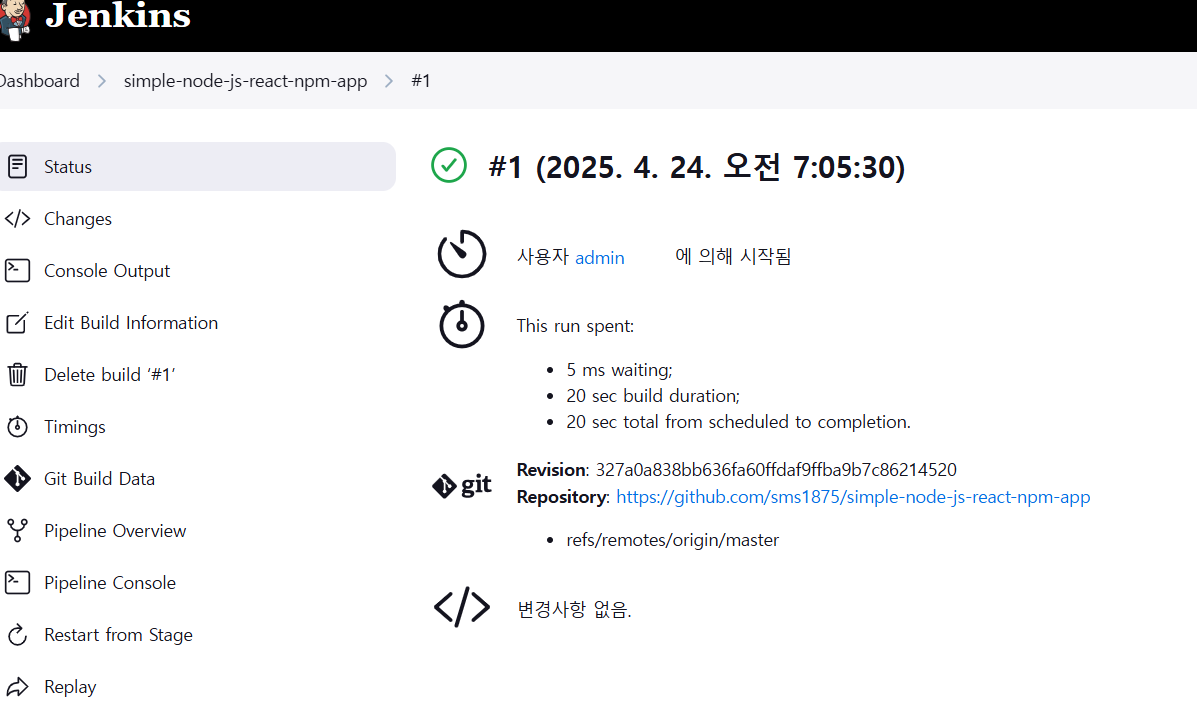
화면에서 #1을 선택하면 다음과 같은 정보들을 확인할 수 있다
- 빌드가 대기열에서 얼마나 대기했는지
- 실제로 빌드가 실행되는데 걸린 시간은 얼마나 되는지
- 콘솔 출력 등등..

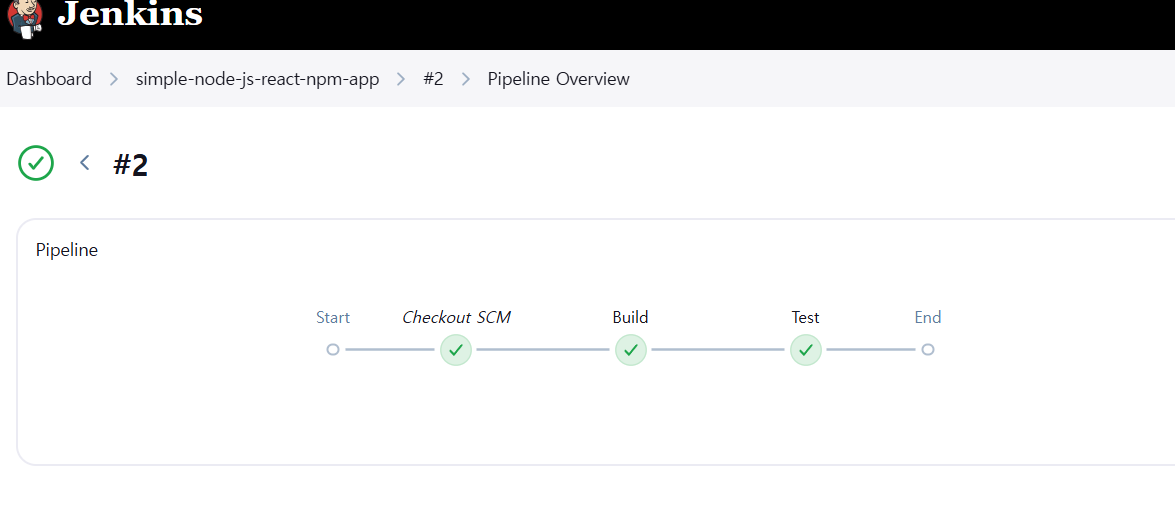
왼쪽 메뉴에서 Pipeline Overview를 선택하면 Jenkinsfile에 정의된 Pipeline의 각 단계(Stage) 의 성공, 실패 여부를 확인할 수 있다
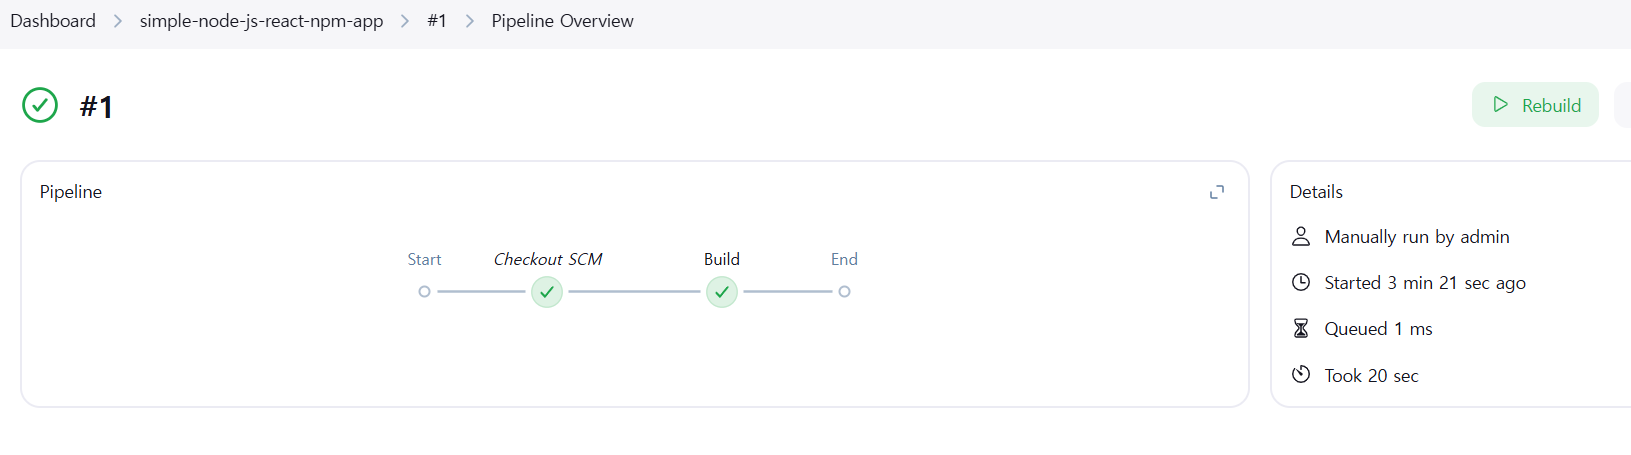
각 단계를 선택하면 해당 단계에 대한 더 많은 정보를 확인할 수 있다
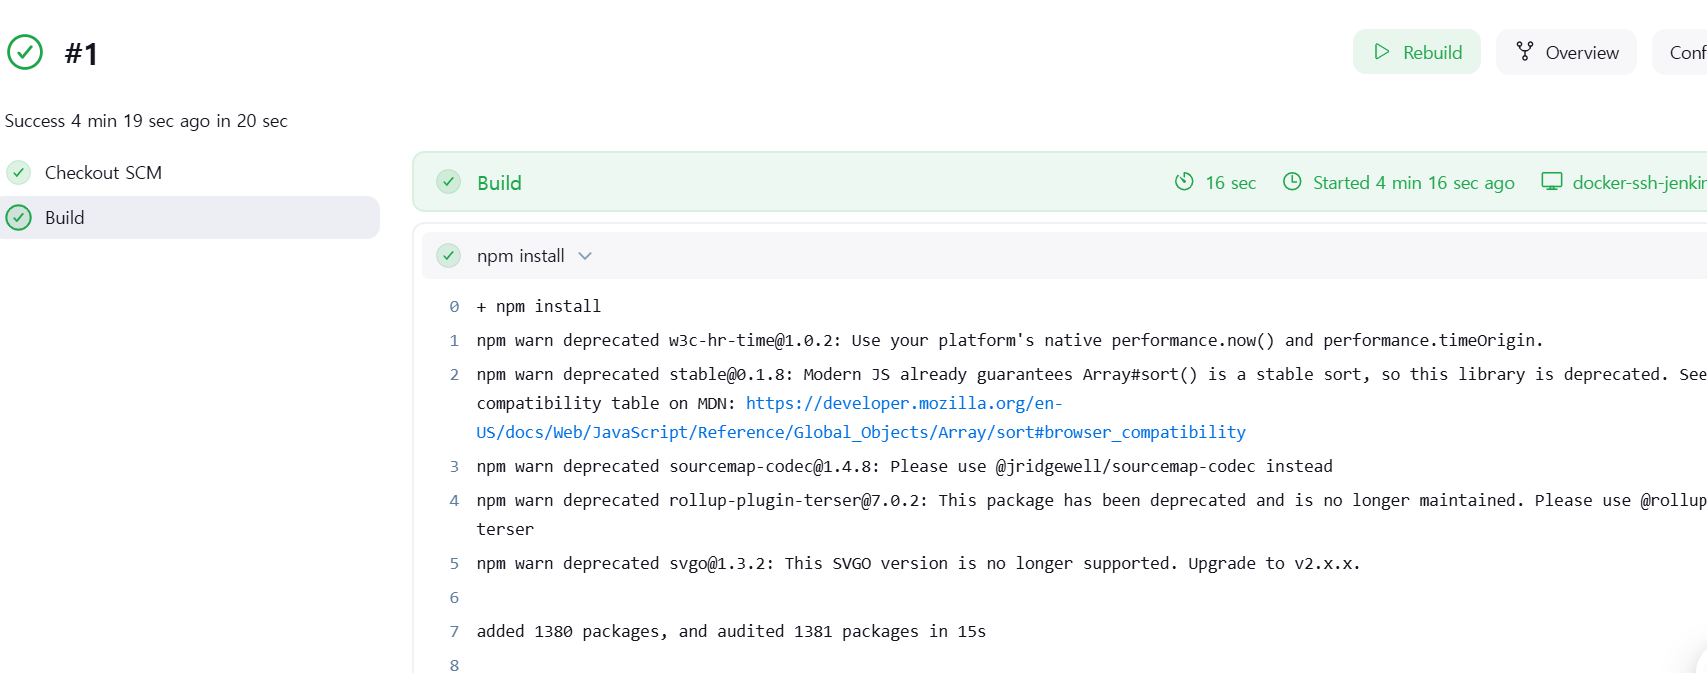
예를 들어 Build 단계를 선택 후, 초록색으로 표시된 npm install을 클릭하면 다음과 같은 내용을 볼 수 있다
npm명령어의 출력 결과 (log)- 의존성 설치 중 발생한 경고나 오류 메시지
- 실제로 어떤 패키지가 설치되었는지 등의 상세 로그
빌드 문제를 디버깅하거나, 설치된 패키지 상태를 확인할 때 매우 유용하다
Pipeline에 테스트 단계 추가하기
Jenkinsfile에 Test stage를 추가한다
일반적으로 Jenkinsfile은 가능한 한 깔끔하게 유지하고, 더 복잡한 빌드 스크립트 단계는 test.sh와 같은 별도의 스크립트 파일로 분리하여 작성하는것이 Pipeline의 유지 관리에 좋다
1
2
3
4
5
6
7
8
9
10
11
12
13
14
15
16
pipeline {
    agent any
    stages {
        stage('Build') {
            steps {
                sh 'npm install'
            }
        }
        stage('Test') { // Jenkins UI에 'Test' 단계 표시
           steps {
                sh './jenkins/scripts/test.sh'
                // simple-node-js-react-npm-app 저장소의 jenkins/scripts 디렉토리에 있는 test.sh 스크립트를 실행한다
            }
        }
    }
}
아까와 같이 지금 빌드를 클릭하면 Stage View에서 Test라는 새로운 컬럼을 확인할 수 있다
#1 과정과 비교해보면 npm 패키지가 이미 설치되어 있어서 시간이 훨신 짧은것을 확인할 수 있다
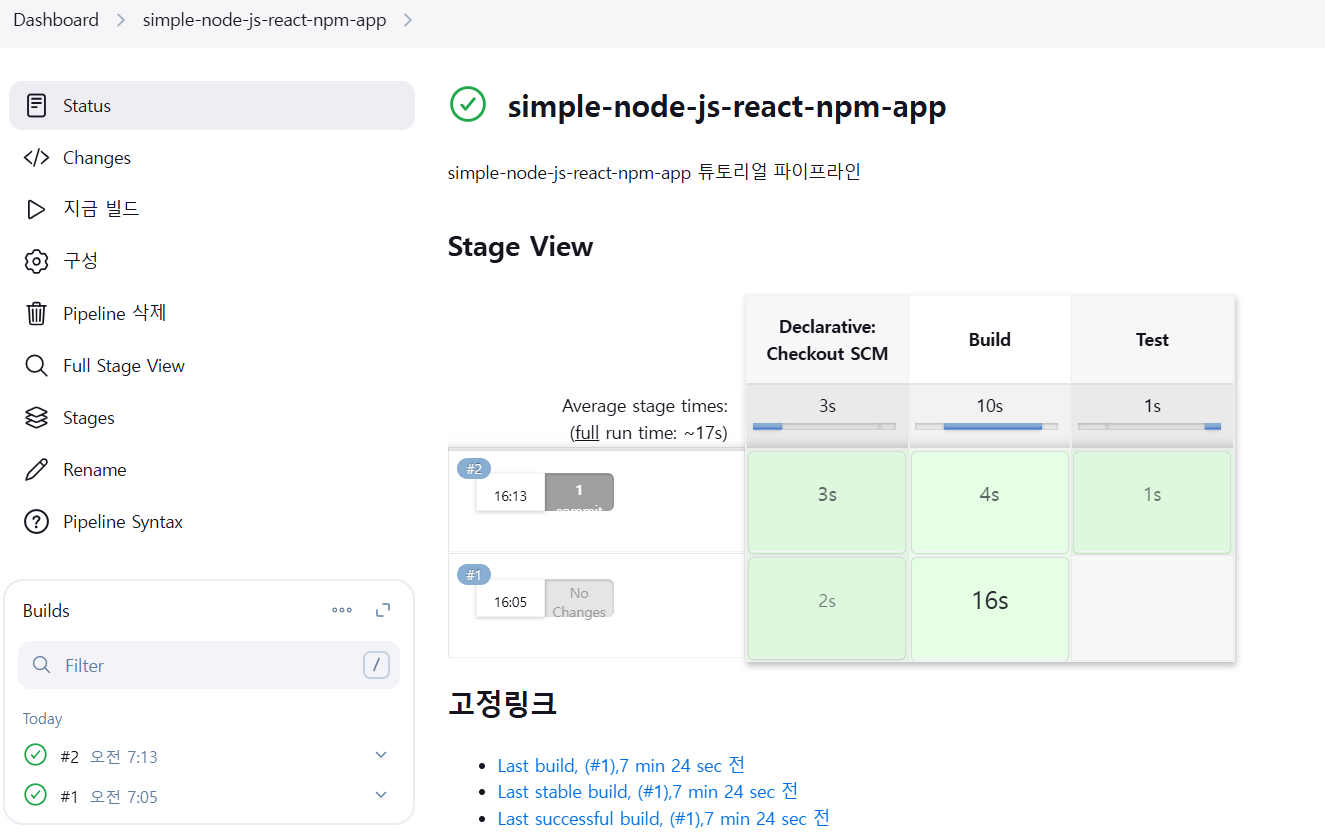
#2를 클릭하면 Test 단계 정보를 확인할 수 있다
deliver 단계 추가하기
Jenkinsfile에 Deliver stage를 추가한다
1
2
3
4
5
6
7
8
9
10
11
12
13
14
15
16
17
18
19
20
21
22
23
pipeline {
    agent any
    stages {
        stage('Build') {
            steps {
                sh 'npm install'
            }
        }
        stage('Test') {
            steps {
                sh './jenkins/scripts/test.sh'
            }
        }
        stage('Deliver') {
            steps {
                sh './jenkins/scripts/deliver.sh'
                input message: 'Finished using the web site? (Click "Proceed" to continue)'
                // 실행 중인 빌드를 일시 정지하고 커스텀 메시지와 함께 사용자에게 계속 진행할지(Proceed) 중단할지(Abort) 확인받는다
                sh './jenkins/scripts/kill.sh'
            }
        }
    }
}
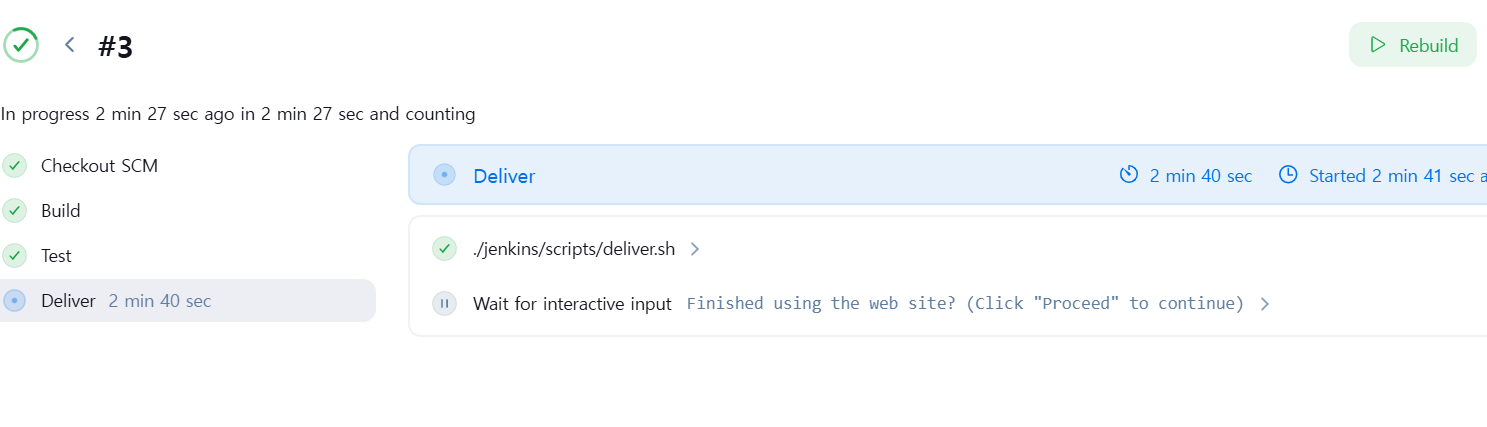
지금 빌드를 클릭하면 Stage View에서 Deliver 컬럼이 추가되고, 클릭하면 메세지를 확인할 수 있다
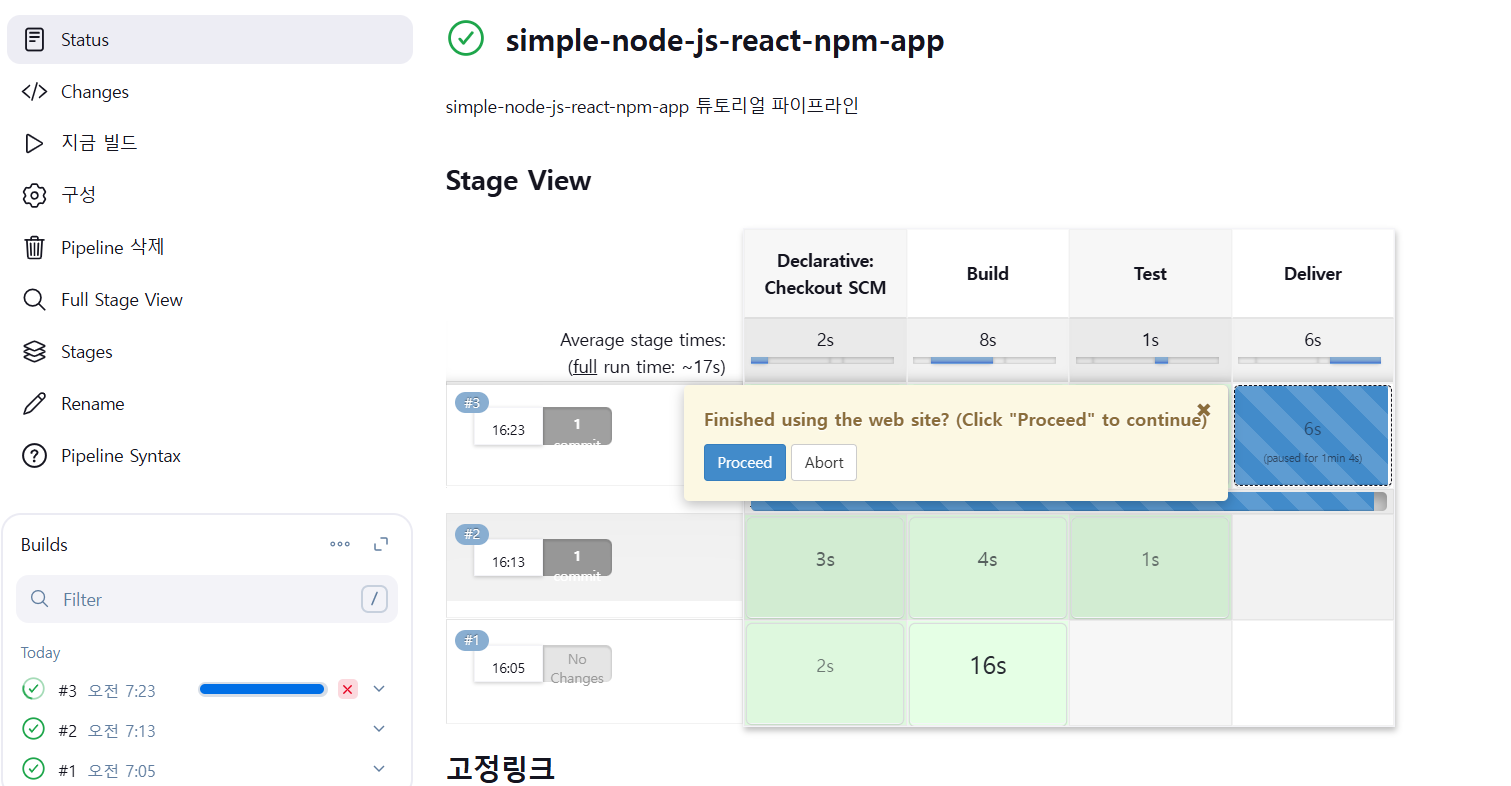
#3 Pipeline을 보면 Deliver stage가 진행중인 것을 확인할 수 있다
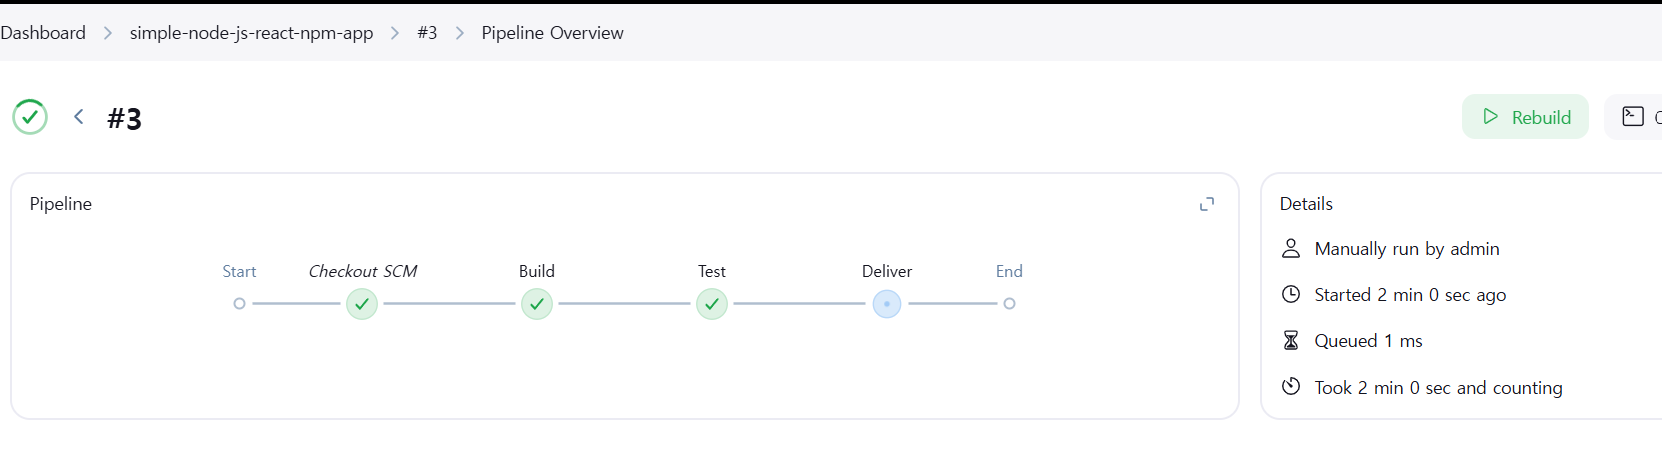
Deliver stage 에서 deliver.sh 스크립트가 성공적으로 실행되고 사용자 입력을 대기중이다
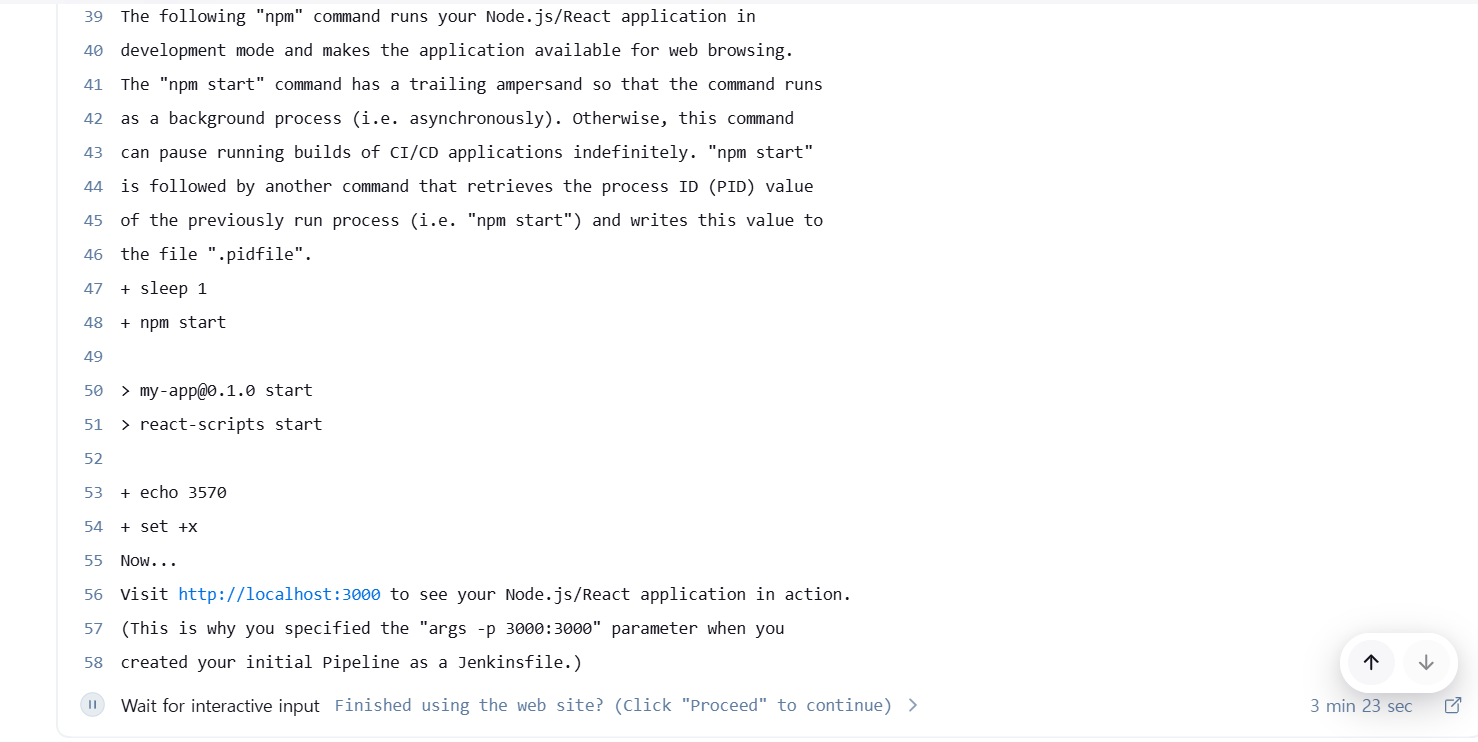
./jenkins/scripts/deliver.sh 스텝을 클릭하고 아래로 스크롤하면 애플리케이션이 로컬 환경에서 http://localhost:3000 포트로 실행중인것을 확인할 수 있다
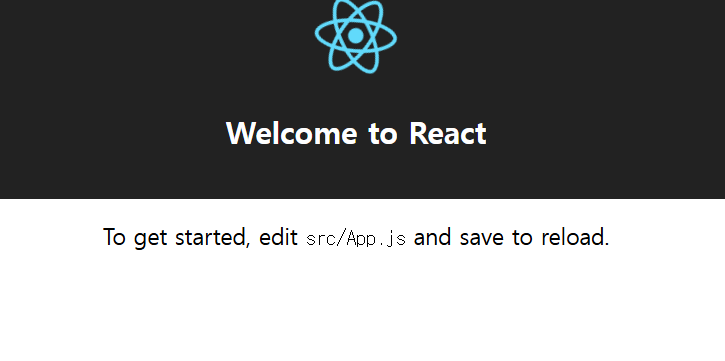
클릭하면 Node.js + React 애플리케이션 화면을 확인할 수 있다
이제 Status에서 Proceed를 클릭하면 Pipeline 과정이 완료된다
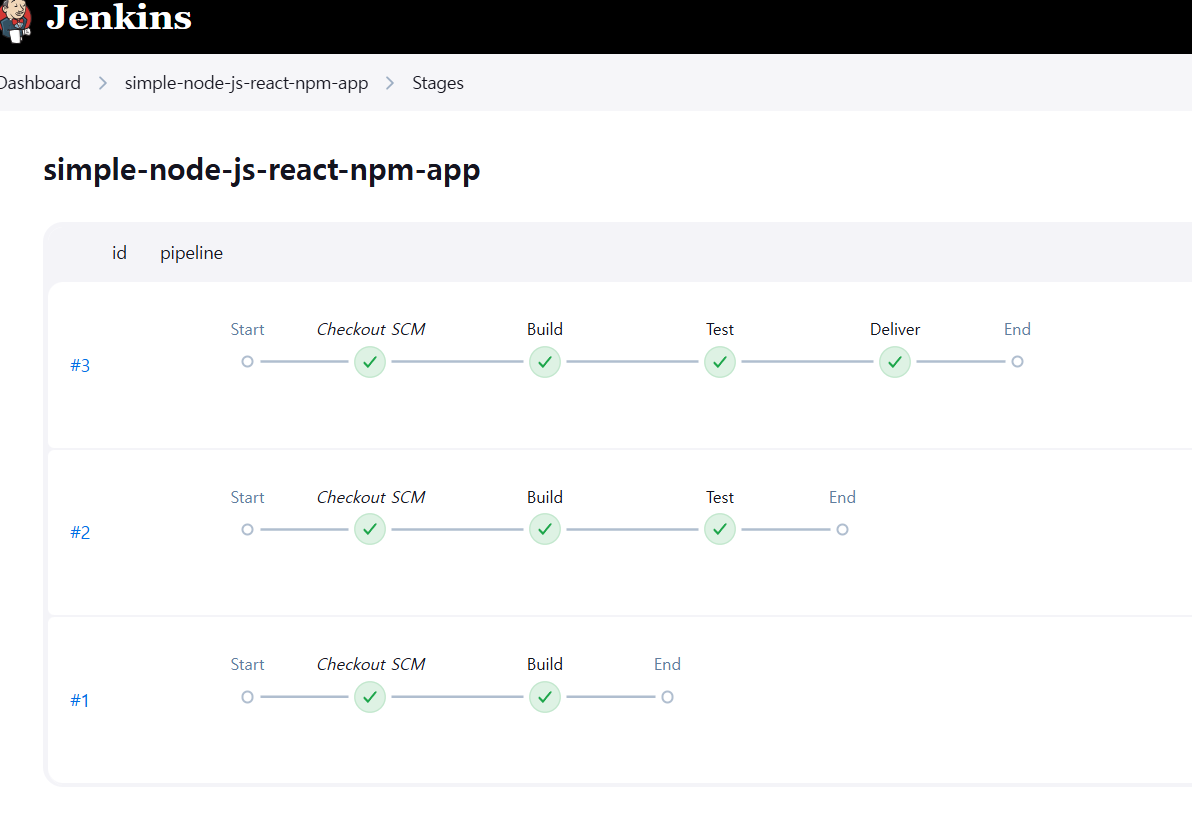
Stages를 클릭하면 실행했던 Pipeline의 실행 목록을 최신 순으로 확인할 수 있다
컨테이너를 종료하고, 튜토리얼에 사용한 볼륨을 제거한다
1
docker compose --profile node down -v --remove-orphans